Changing fields definitions in the ISO8583 simulator and message converter
Posted on 31st Oct 2017 7060 views
In this post we explain how to change individual fields settings so they match your specification. All configurable via GUI or by altering the configuration files directly.
Method 1. Alter settings via UI (User Interface)
1. Open the neaPay ISO8583 simulator UI and navigate, on the left menu or the top menu, to Messages.
2. Expand Messages, and then expand ISOMessage
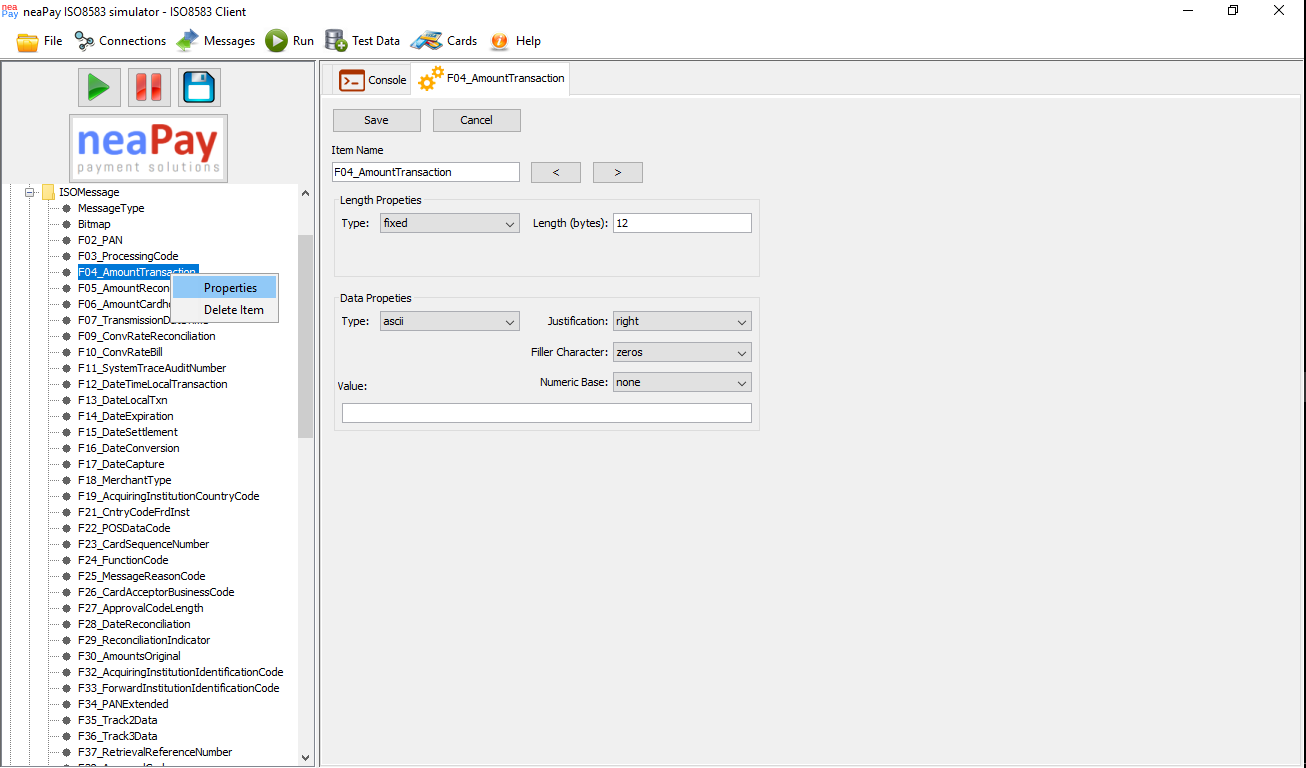
3. Select F04_AmountTransaction, right click and select Properties. A new tab will open, with the properties of this field.
4. Change the 'Length(bytes)' from "12" to "13"
5. Change the 'Value' to 1234 (Optional). This will only be used then the test data has no data and the scripts will not overwrite it.
6. Press the Save button on the window to save to UI memory. This will not make it available at execution time.
7. Press the Save to disk button on the left menu (Blue floppy disk) to make the changes permanent for the Core to use.
8. Close your simulator and open it again to reload settings.
9. Press Start to start your simulator with the new settings.
10. Check the new generated message that it has a length of 13 digits, but the value has NOT changed to 1234, but the value in the test data is used.
Method 2. Alter settings via configuration files. This is great for versioning of settings.
1. Close the simulator. This is important.
2. Go to the deployment folder and open script_variables.js and make a backup copy.
3. Open it with an editor, identify the message named ISOMessage
4. Inside this message, identify the item named F04_AmountTransaction
5. This row should look like this:
F04_AmountTransaction:{name:"F04_AmountTransaction",length_type:"fixed 12",data_type:"ascii",base:"none",justified:"right",fill:"zeros",bitmap_position:"4",value:""},
6. Change it to
F04_AmountTransaction:{name:"F04_AmountTransaction",length_type:"fixed 13",data_type:"ascii",base:"none",justified:"right",fill:"zeros",bitmap_position:"4",value:"1234"},
7. Open the simulator again to reload settings.
9. Press Start to start your simulator with the new settings.
10. Check the new generated message that it has a length of 13 digits, the value has NOT changed to 1234, but the value in the test data is used.